Lab 00 - C++ Coding Setup - Windows Edition
Overview
In this course, you'll need to solve some problems using the C++ language. For this assignment, you'll make sure your C++ development environment is set up correctly.
There are a few options for compiling C++ code on Windows. One option is to use Microsoft Visual Studio. If you want to take this option, start at step 1 below.
Another option is to install the MinGW compiler, then compile using the command-line.
If you choose that route, follow the instructions here to install MinGW. Then, begin at step 2 of the linux instructions.
1. Download Visual Studio Community Edition
Visual Studio is an integrated development enviroment (IDE), which allows you to write, test, and debug your code. Visual Studio Community Edition is available for free for Windows. You can download it here.
2. Configure the Installation Options
After you download the installer and run it, you will be presented with the following screen. Select the option to install "Desktop development with C++".
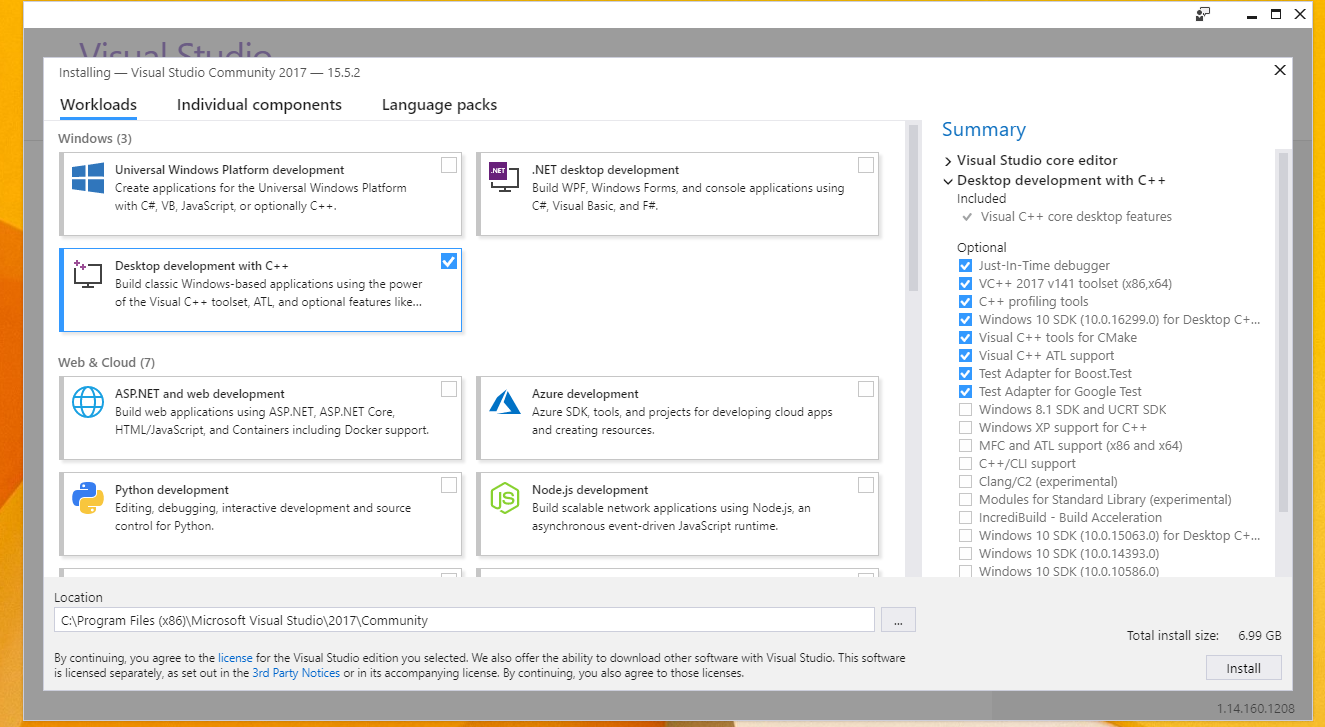
Next, click on the "Individual components" tab and under the "Code Tools" section, check the box to include the NuGet package manager.
Then, click the Install button to install Visual Studio on your computer.
3. Create a new C++ Project
Visual Studio has a lot of options and project types. Follow these steps to create an empty C++ project:
-
From the File menu, hover over New, then select Project.
-
In the New Project window, navigate to the C++ section. In the center of the window, select the Empty Project template.
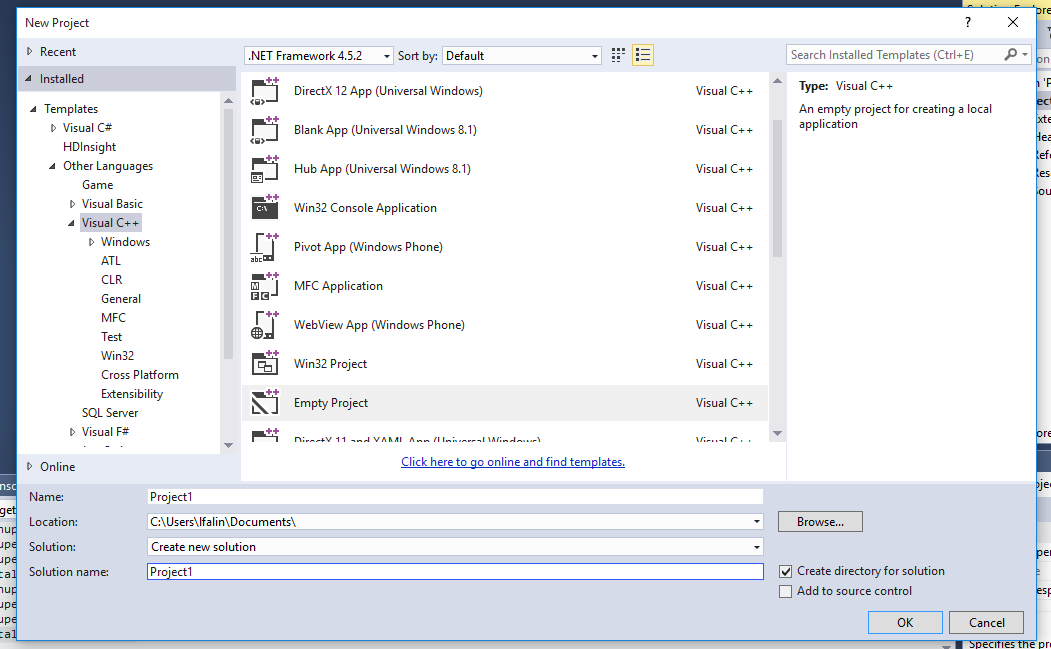
-
At the bottom of the window, type the name of the project. If you wish to save the project in a different location, you may also change that here. When you are finsihed, click OK
-
Right-click on the Source Files folder, and select Add->New Item.
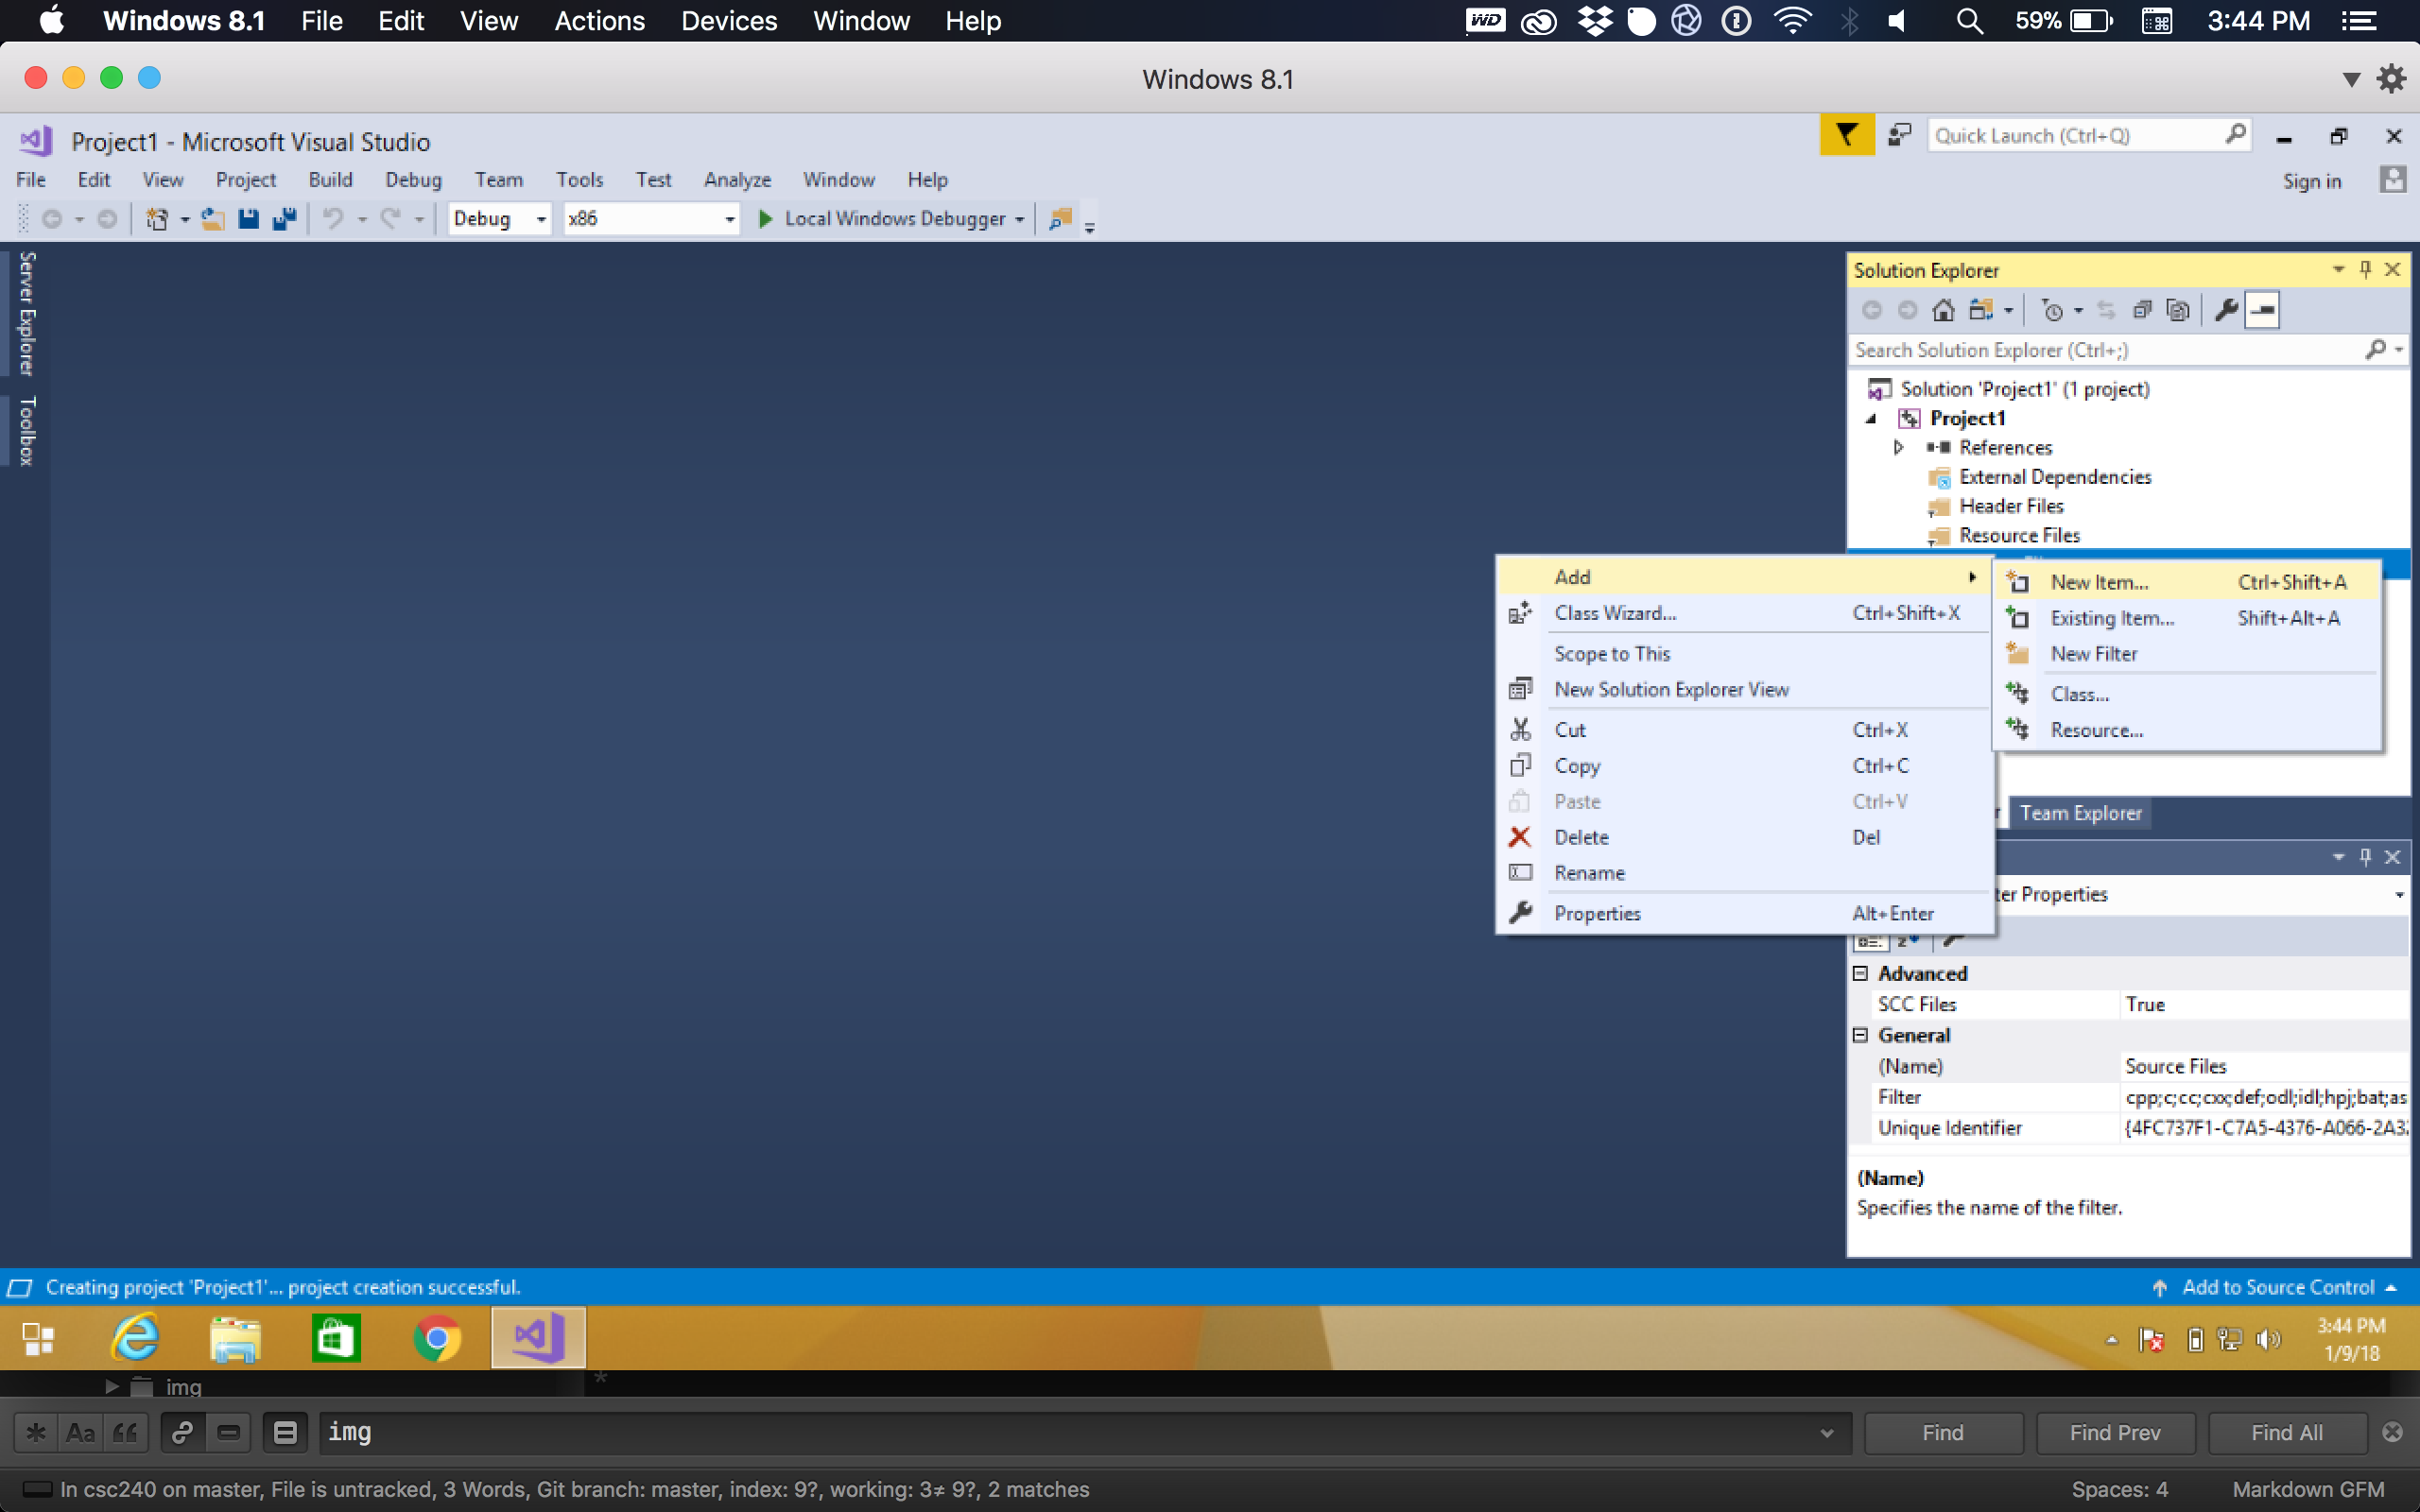
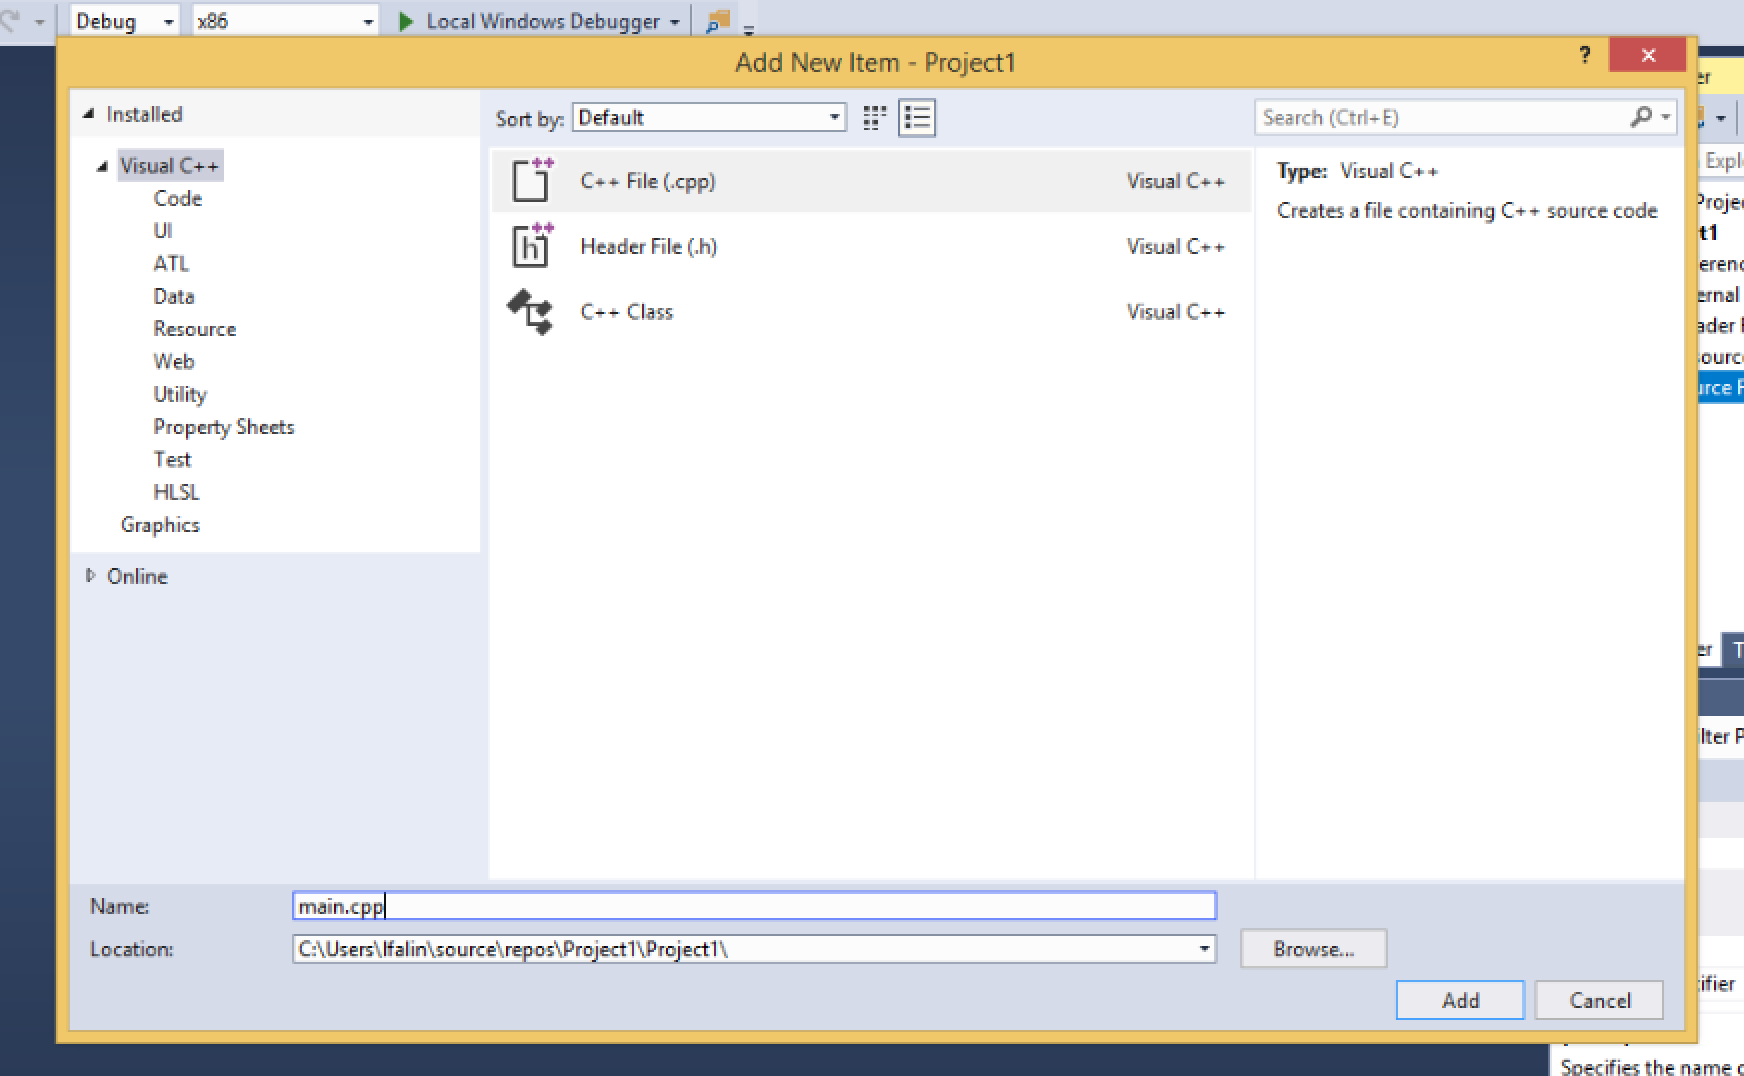
-
Select "C++ File (.cpp)", name the file `main.cpp` and click the Add button.
4. Write some C++ code
#include <iostream>

int main() {
    std::cout << "Hello world!\n";
    return 0;
}
The main function is the entry point to C++ programs. std::cout is the console output stream object. The above code uses the stream operators (<<) to stream the text "hello world!", followed by a new line, to the console output, causing the text to appear on the screen.
5. Compile and run the code
If you click the green play button at the top of the window, you should see a black console window appear, print "Hello world!", then disappear in the blink of an eye.
The reason this happens is because when Windows runs an executable, it only keeps the window open long enough for the program to finish running. In our case however, it's nice to be able to view the program output. To make this possible, we'll need to do the following:
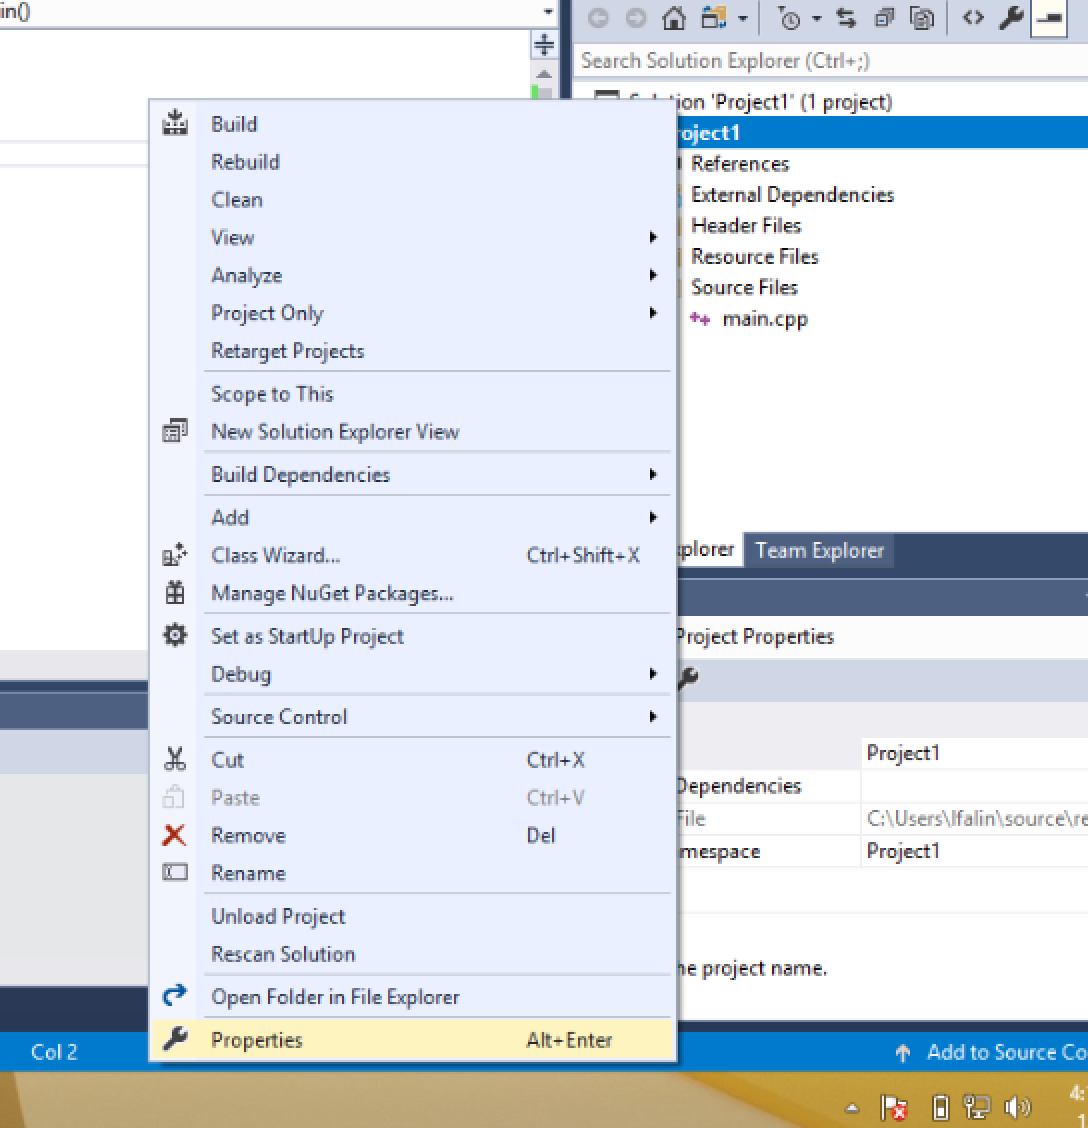
-
In the solution explorer on the right-hand side of the window, right click on the project and select Properties.
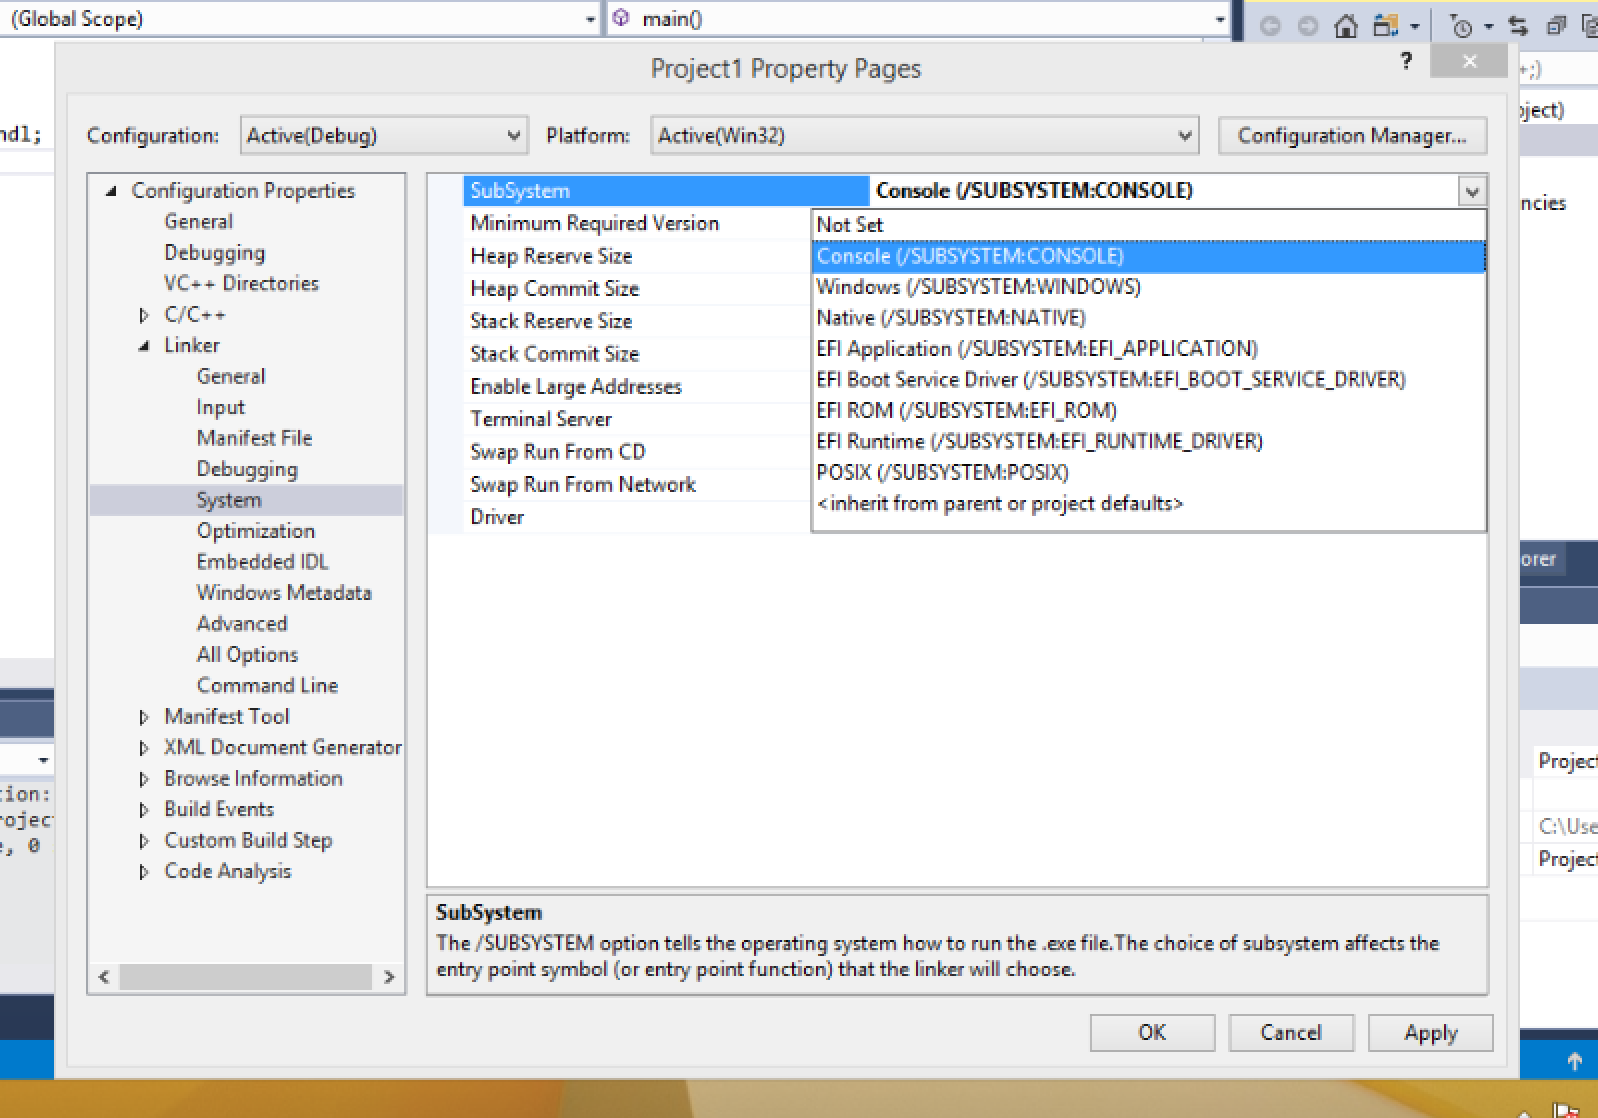
-
In the Configuration Propertis, expand the "Linker" section, and click on System. Then change the SubSystem to "Console" and click "OK".
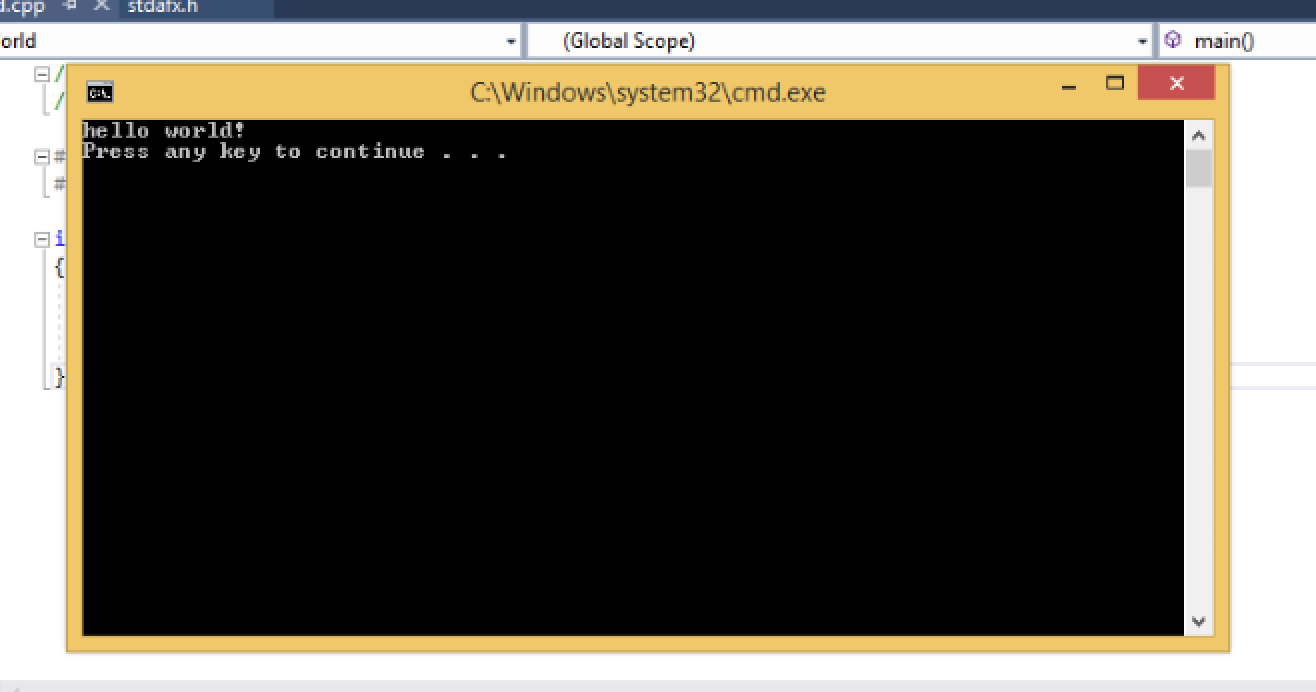
-
Now if you click the green arrow, the same thing still happens.
However, if you click on the "Debug" menu at the top and click "Start without Debugging", (or press `Ctrl+F5` as a shortcut), the program will run, then pause at the end until you press a key to close the window.
6. Submission
To finish up, modify the code so that instead of "Hello World", it says "Hello, YOUR NAME". So if my name were Lee, it should say "Hello Lee".
Run the program to make sure it works, then right click on the project (not the solution) and select "Open Folder in File Explorer". Find the main.cpp file, and upload it to mySVU.
If mySVU gives you an error about the file type, put the main.cpp file in a zip file and upload the zip file.