Lab 01 - Introduction to Java
Overview
In this assignment you'll install what you need to run a basic Java program, learn how the ACM Java Task Force library works, and create a project template based on that library.
Assignment
Part I: Install and Configure the Java JDK
First, we need to install the Java SDK and configure your system to use it. Please follow the instructions in the video that corresponds to your operating system.
Windows 10
Windows 8 / 8.1
macOS
Once you have the JDK successfully installed, move on to Part II.
Part II: Install IntelliJ
While we could now write and compile Java code on the command line, most modern software developers use IDEs (Integrated Development Environments) for these tasks.
There are several Java IDEs available. We'll be using the IntelliJ IDE because it will allow us to create regular Java and Android projects.
To begin, download and install the free, Community edition of IntelliJ. Alternatively, you can signup for the IntelliJ student program, which gives you access to IntelliJ Ultimate, plus many other software packages produced by JetBrains.
Part III: Write a basic Java program
-
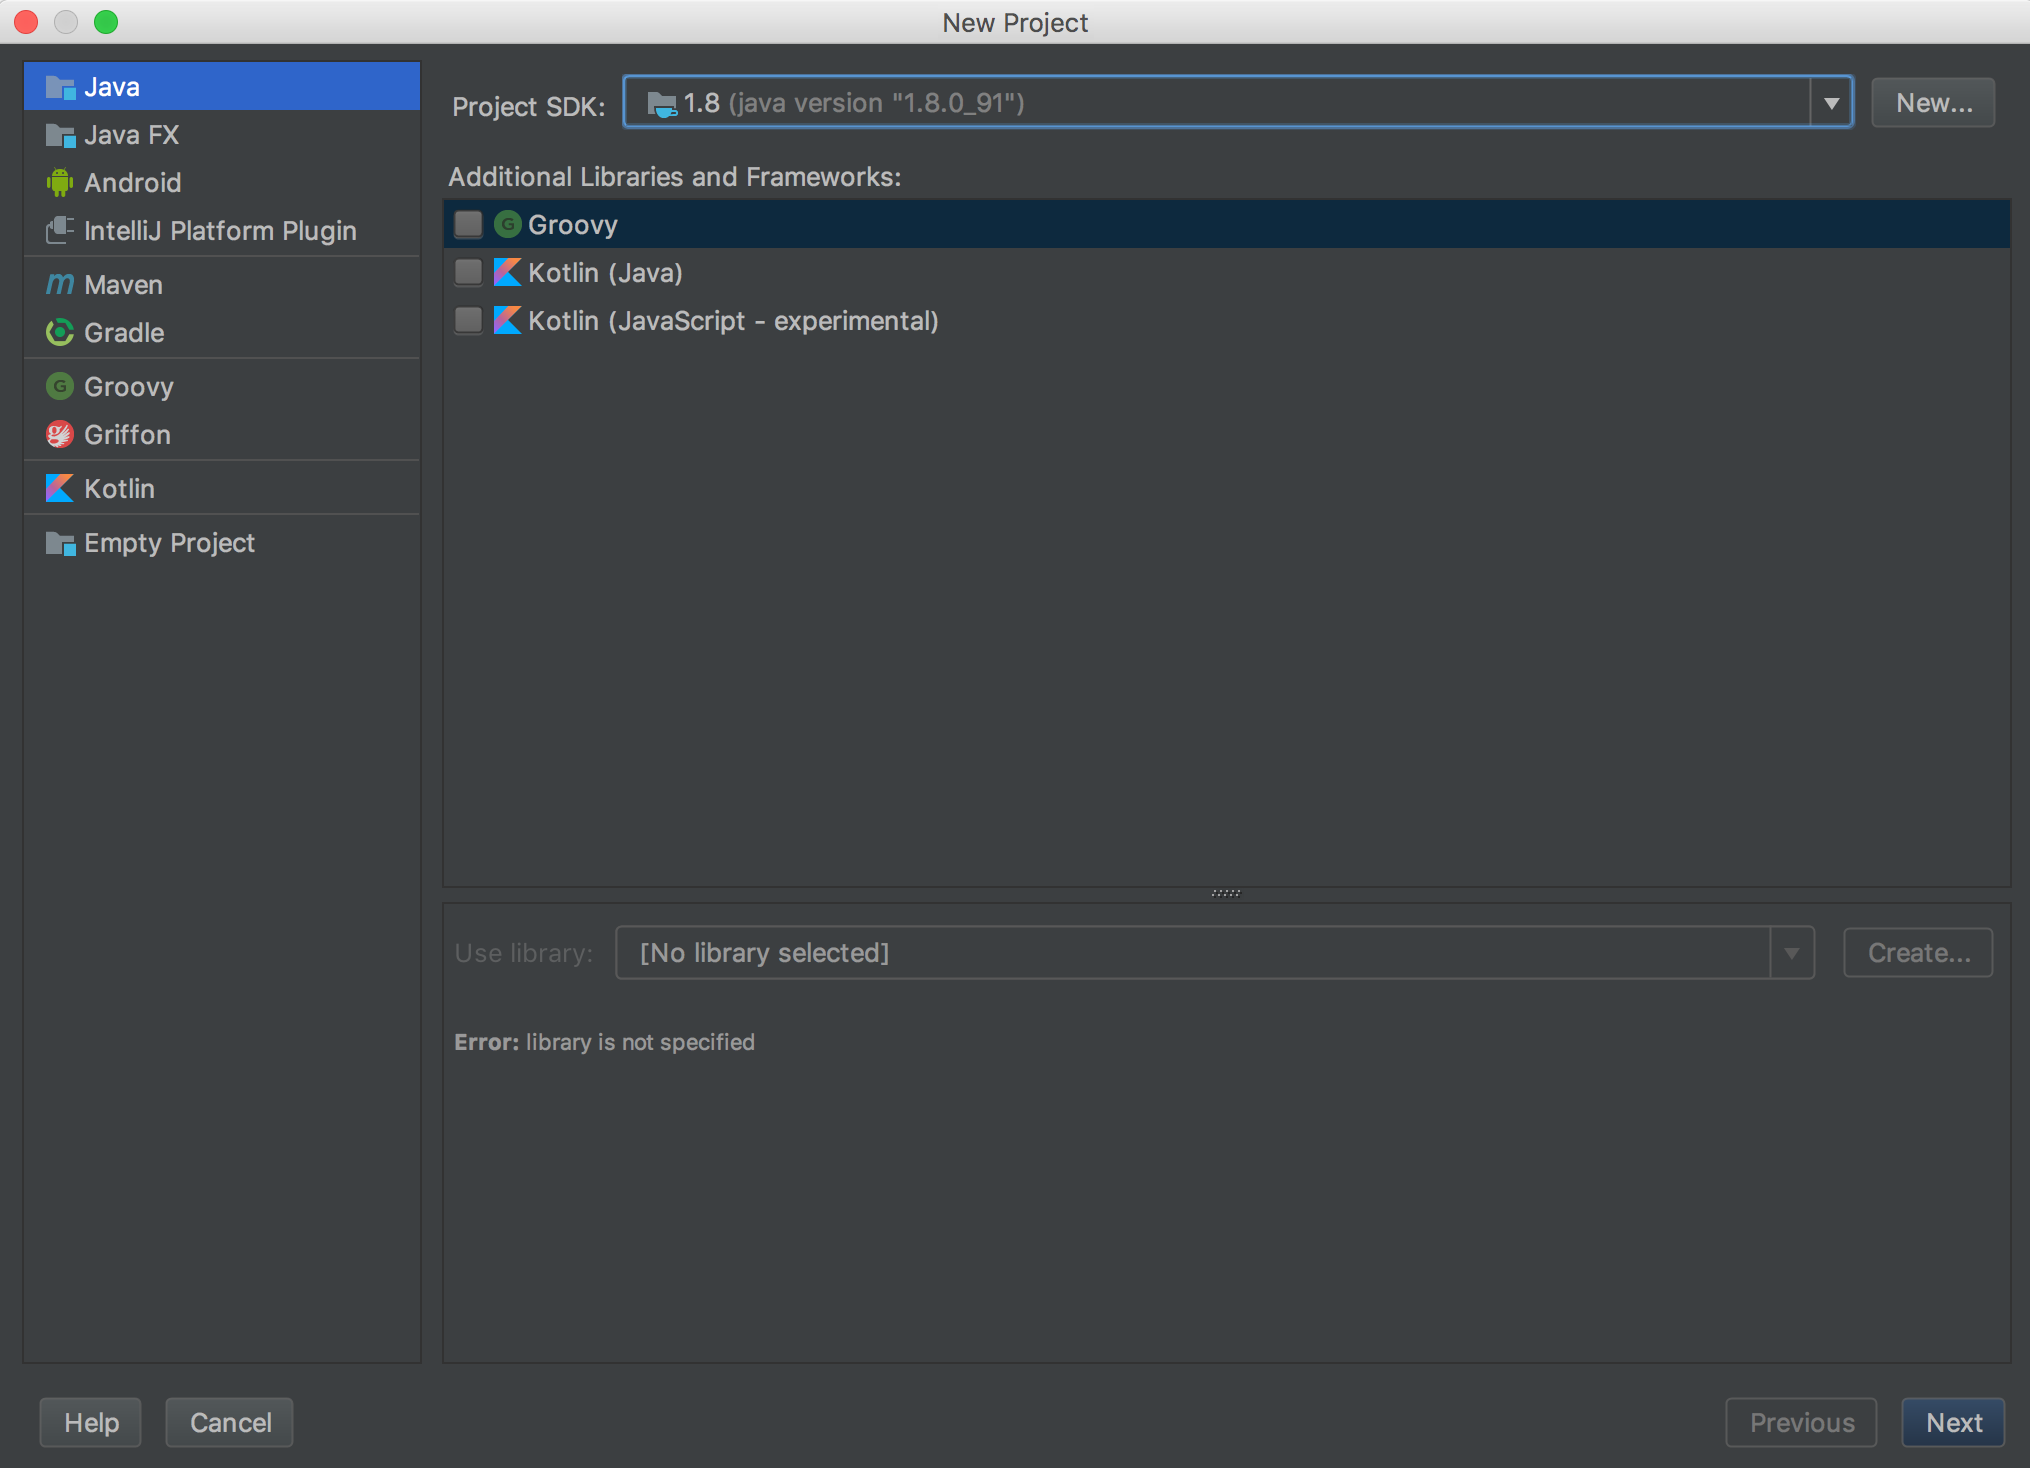
Launch IntelliJ and select "Create a New Project".
Select "Java" from the project types on the left-side of the window, make sure the Java SDK version you downloaded is selected at the top, and then click "Next".
-
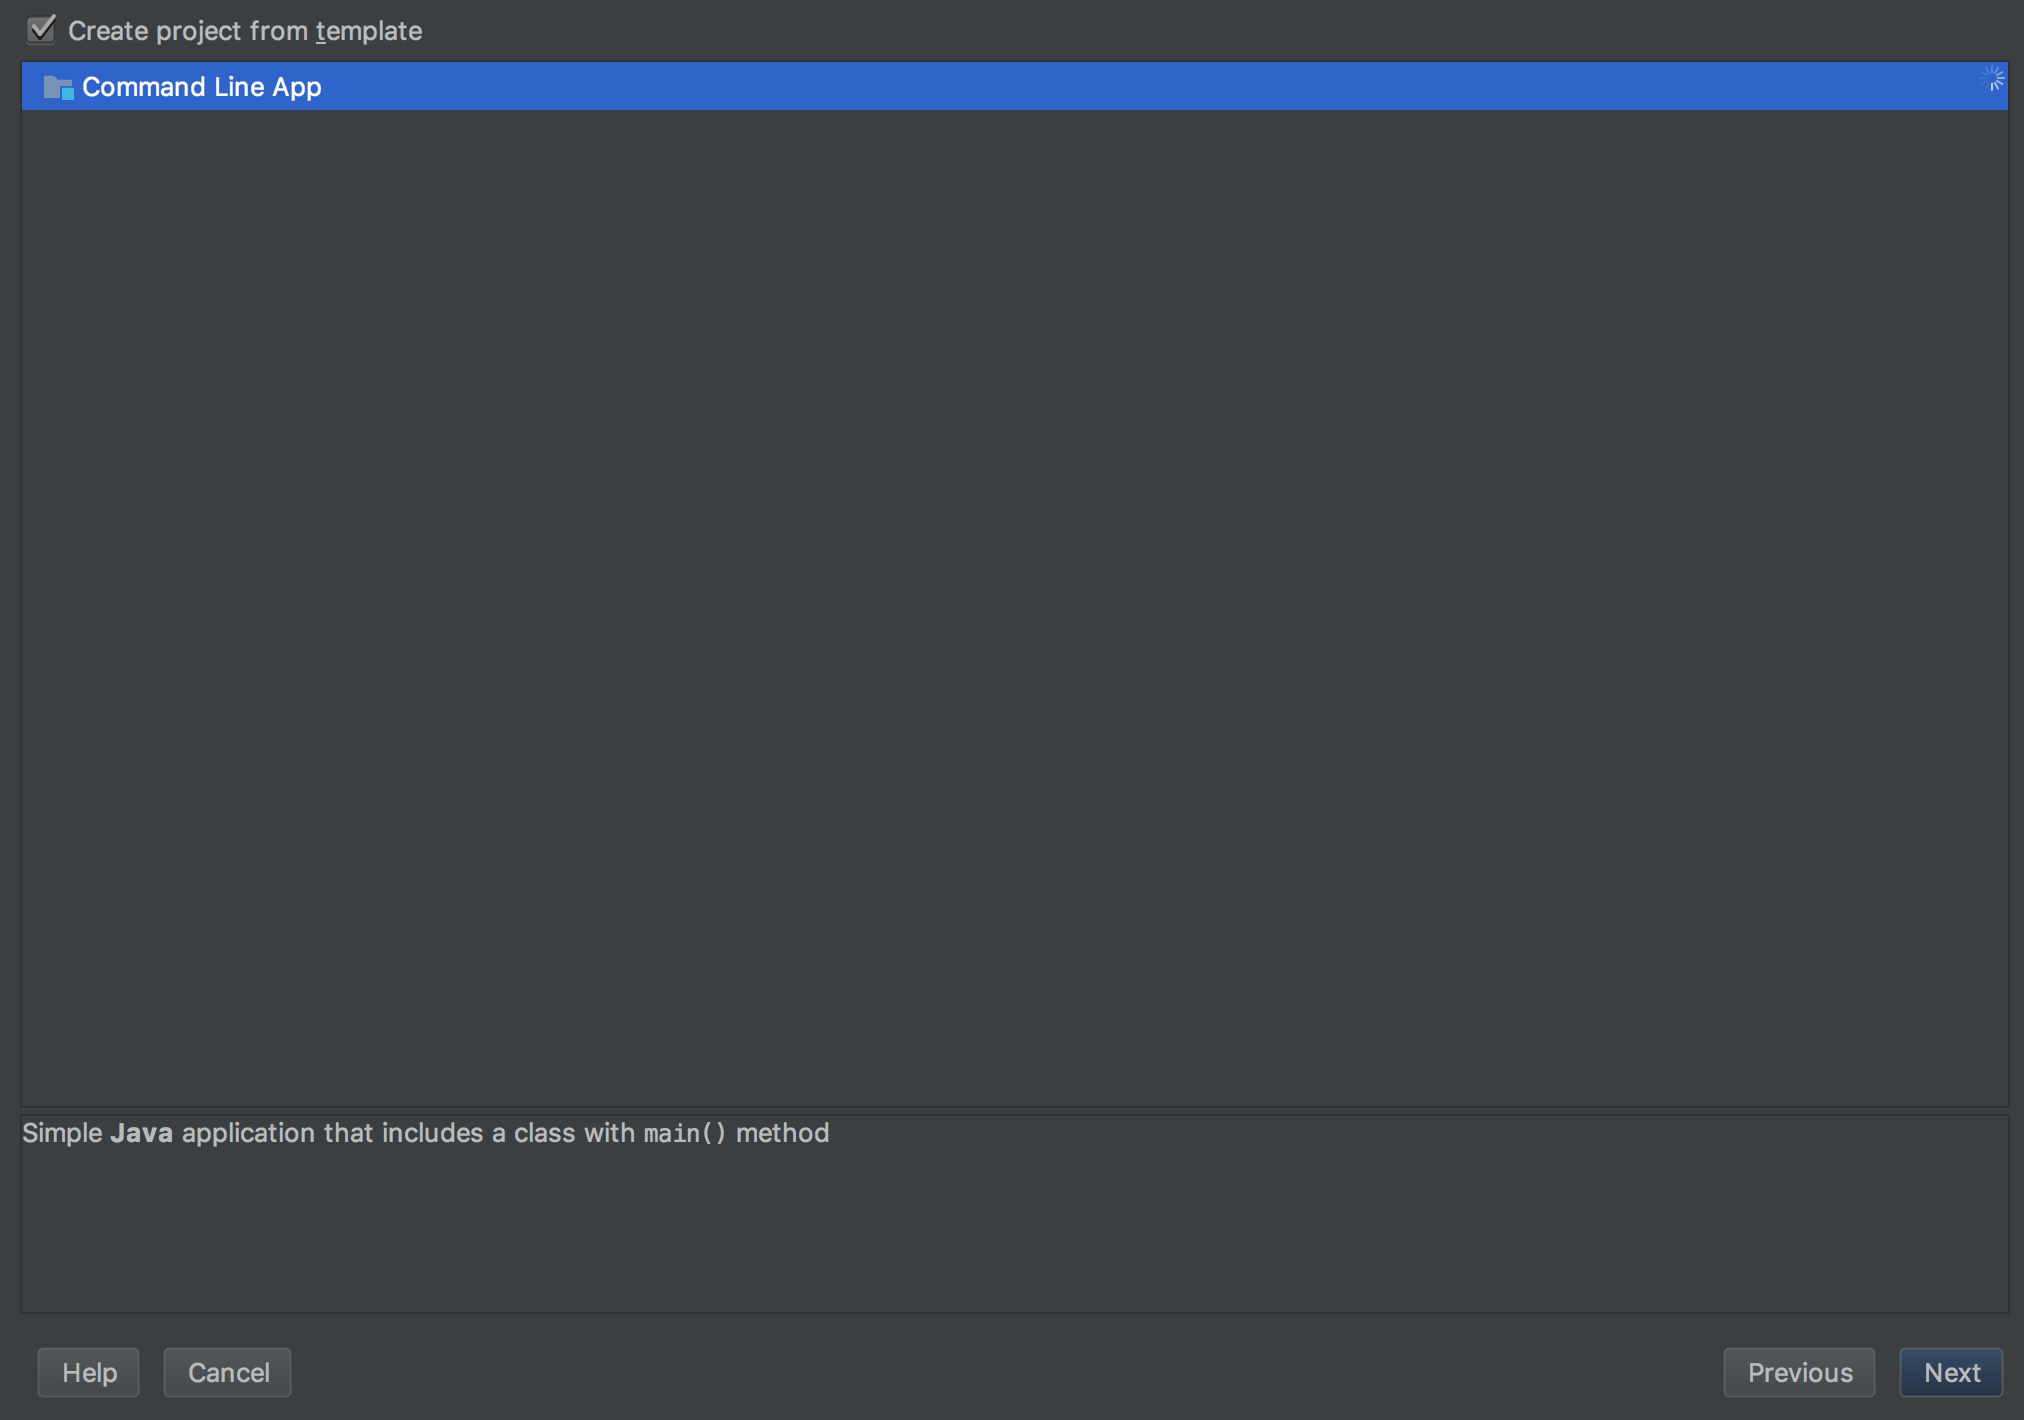
Check the "Create project from template box", select "Command Line App" from the template list, and click "Next".
-
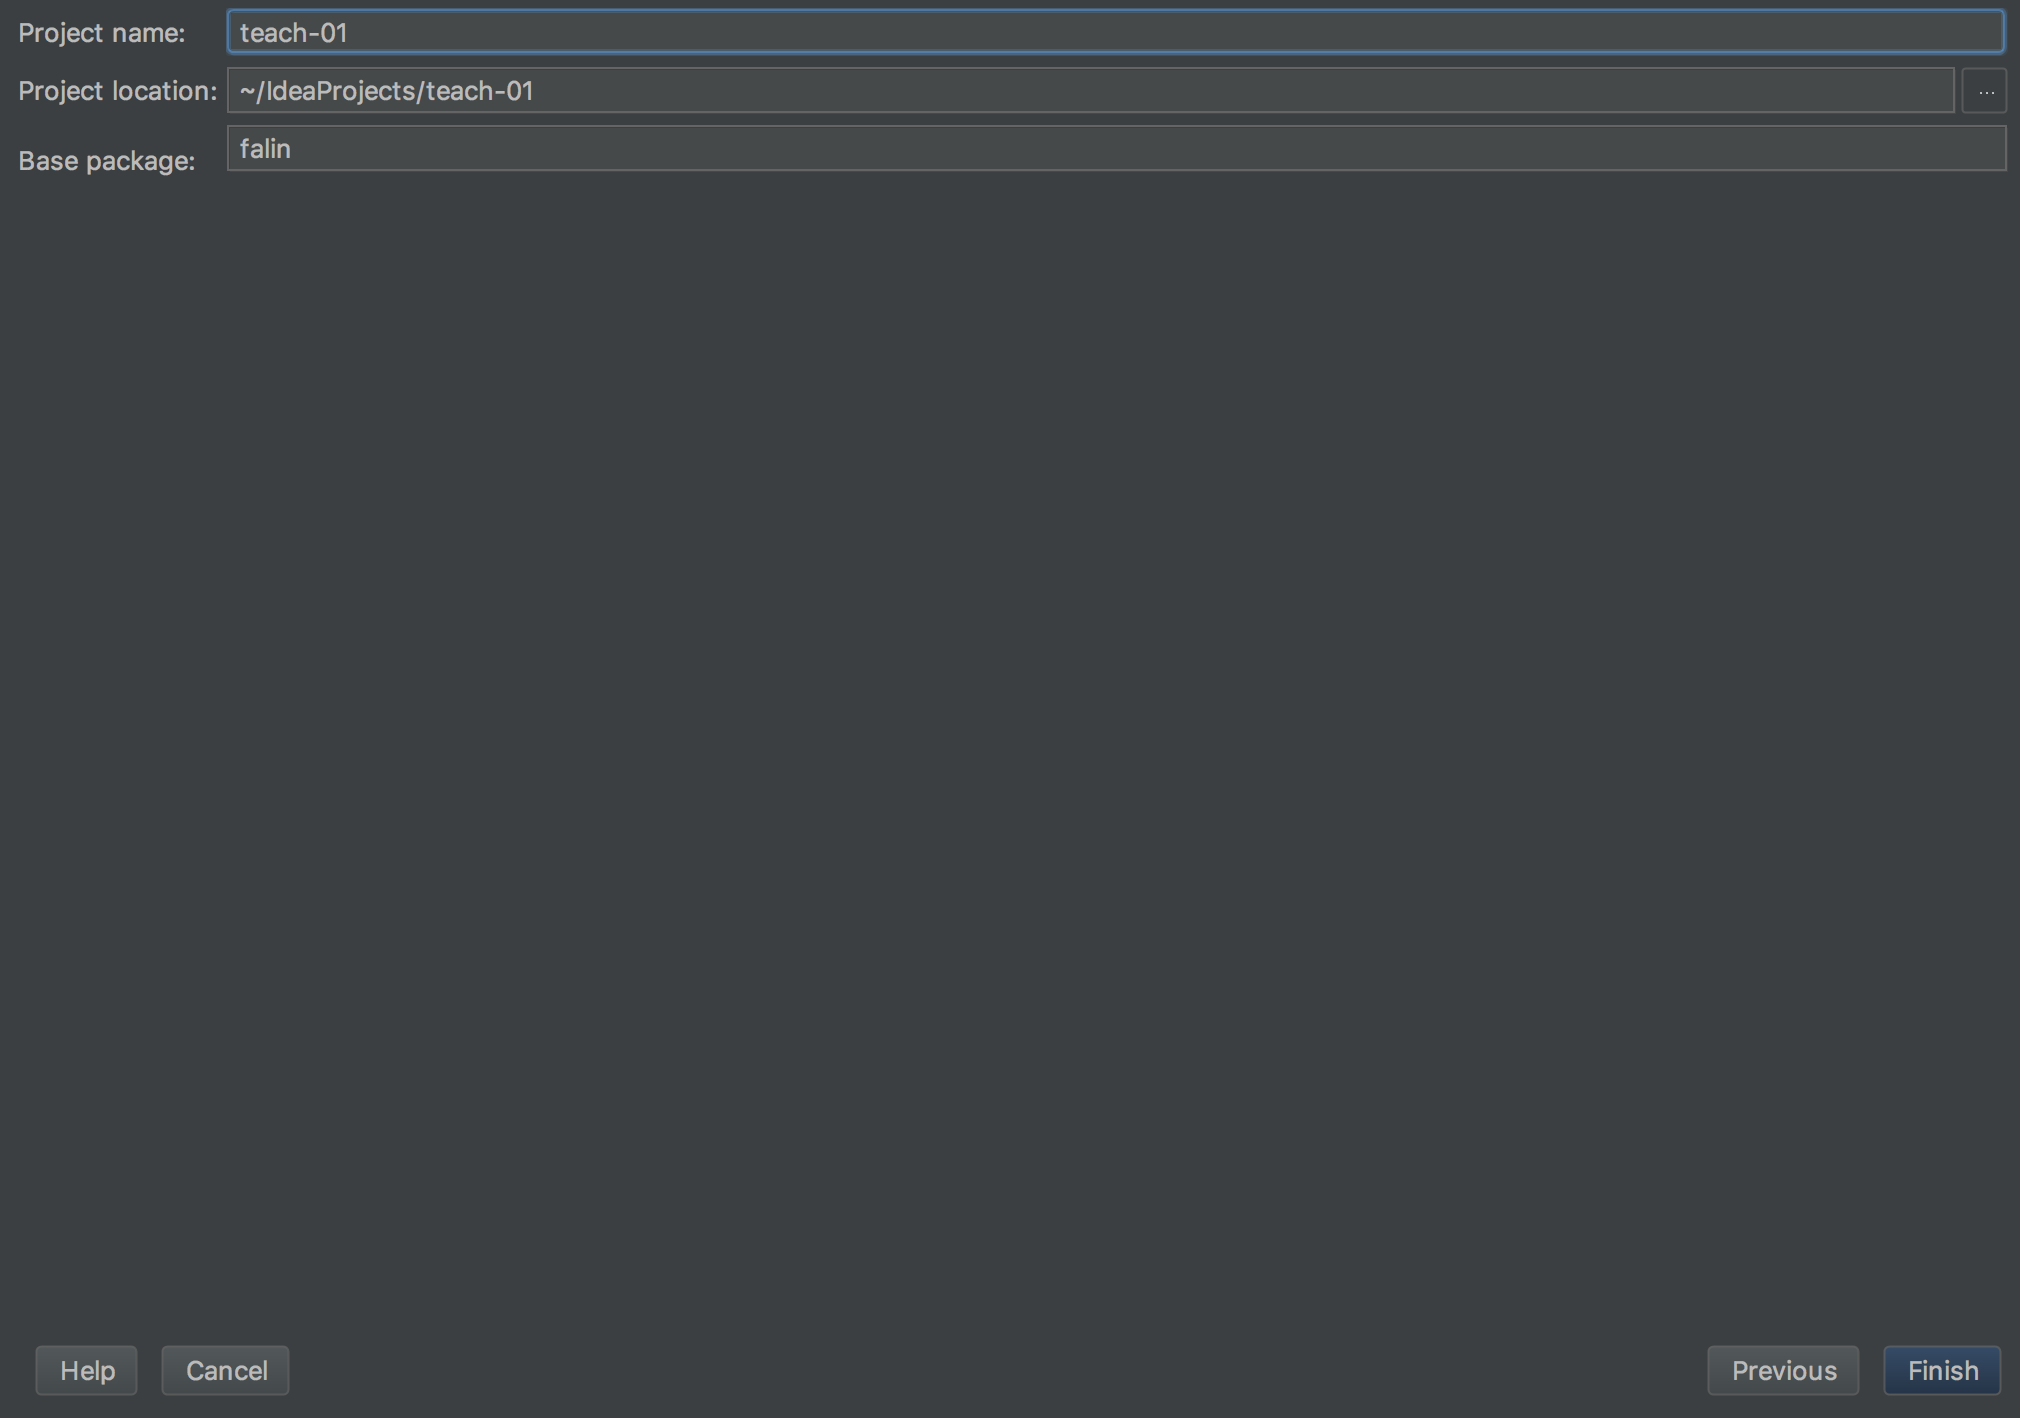
Fill in the project settings. What you enter here isn't too critical, but a good guideline is to name your projects after the assignment number (e.g. this one would be "assignment-01") or the name of the assignment ("java-hello-world"). Note that you shouldn't use spaces in the project name.
You can set your base package name to either be your last name or the name of the project without spaces (e.g. "helloworld"). Note that the package name should be in lowercase, according to the Package Names section of the Java Style Guide.
Once you've entered the values, click "Next".
-
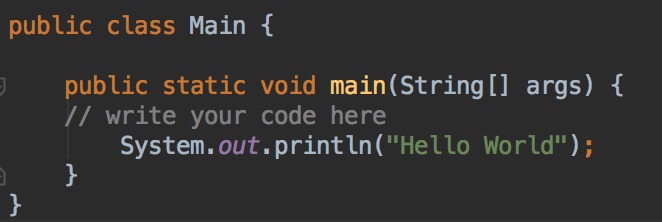
Wait a few moments while the project loads, and if everything went well, you should see a new project loaded with a class called
Mainthat is pre-populated with themain()method. -
Add the following code to the
main()method:System.out.println("Hello World");It should look like this:
-
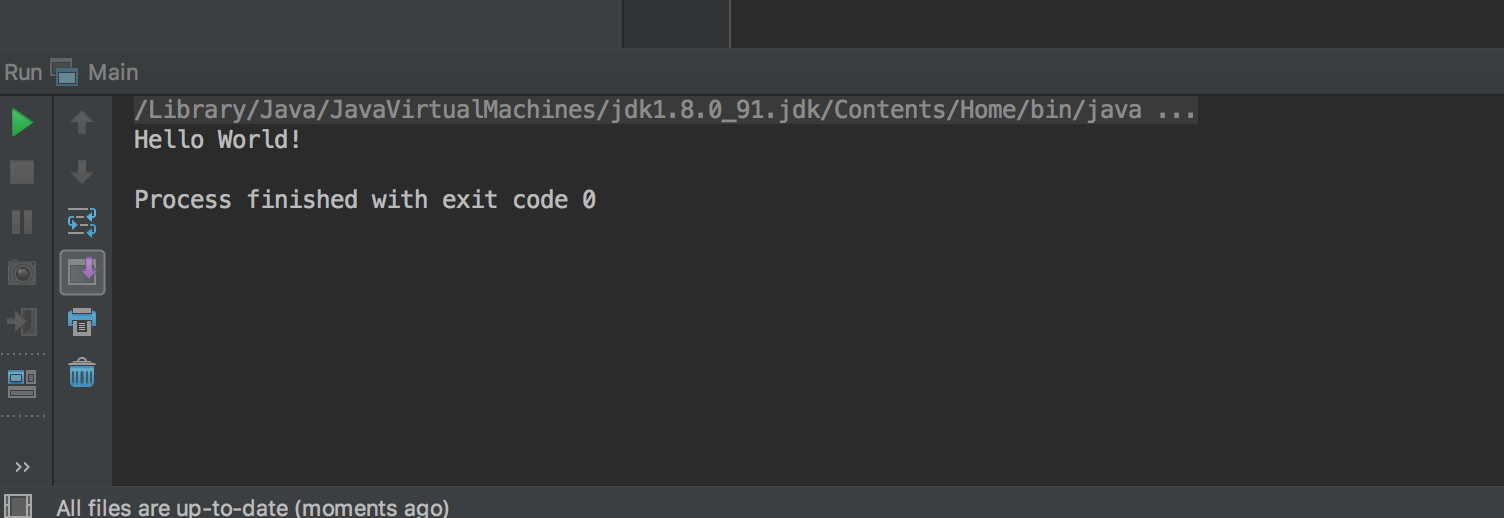
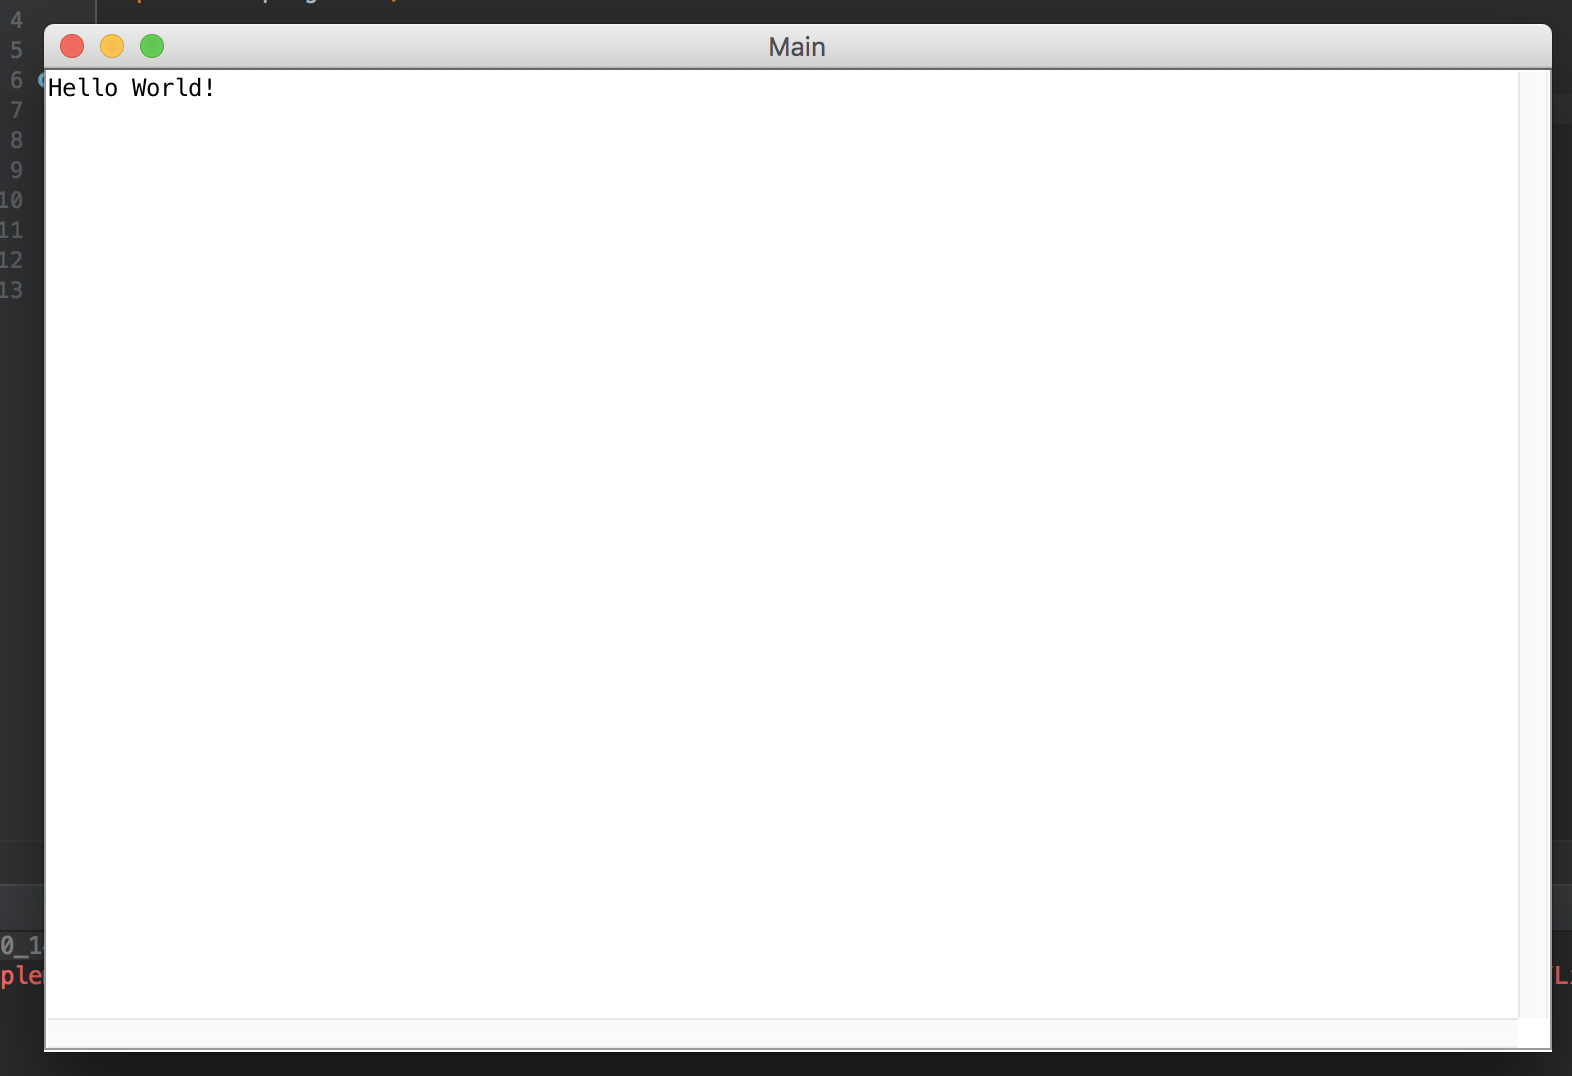
Try to compile and execute your code by clicking on the green play button in the upper-right hand corner of the window.

If all goes well, you should see the text "Hello World" displayed in the output console at the bottom of the window.
Part IV: Use the ACM JTF Libraries
-
Download the ACM library and store it someplace special, such as a folder called `javalib` in your documents folder.
-
Create a new project in IntelliJ following steps 1 - 4 of Part III.
-
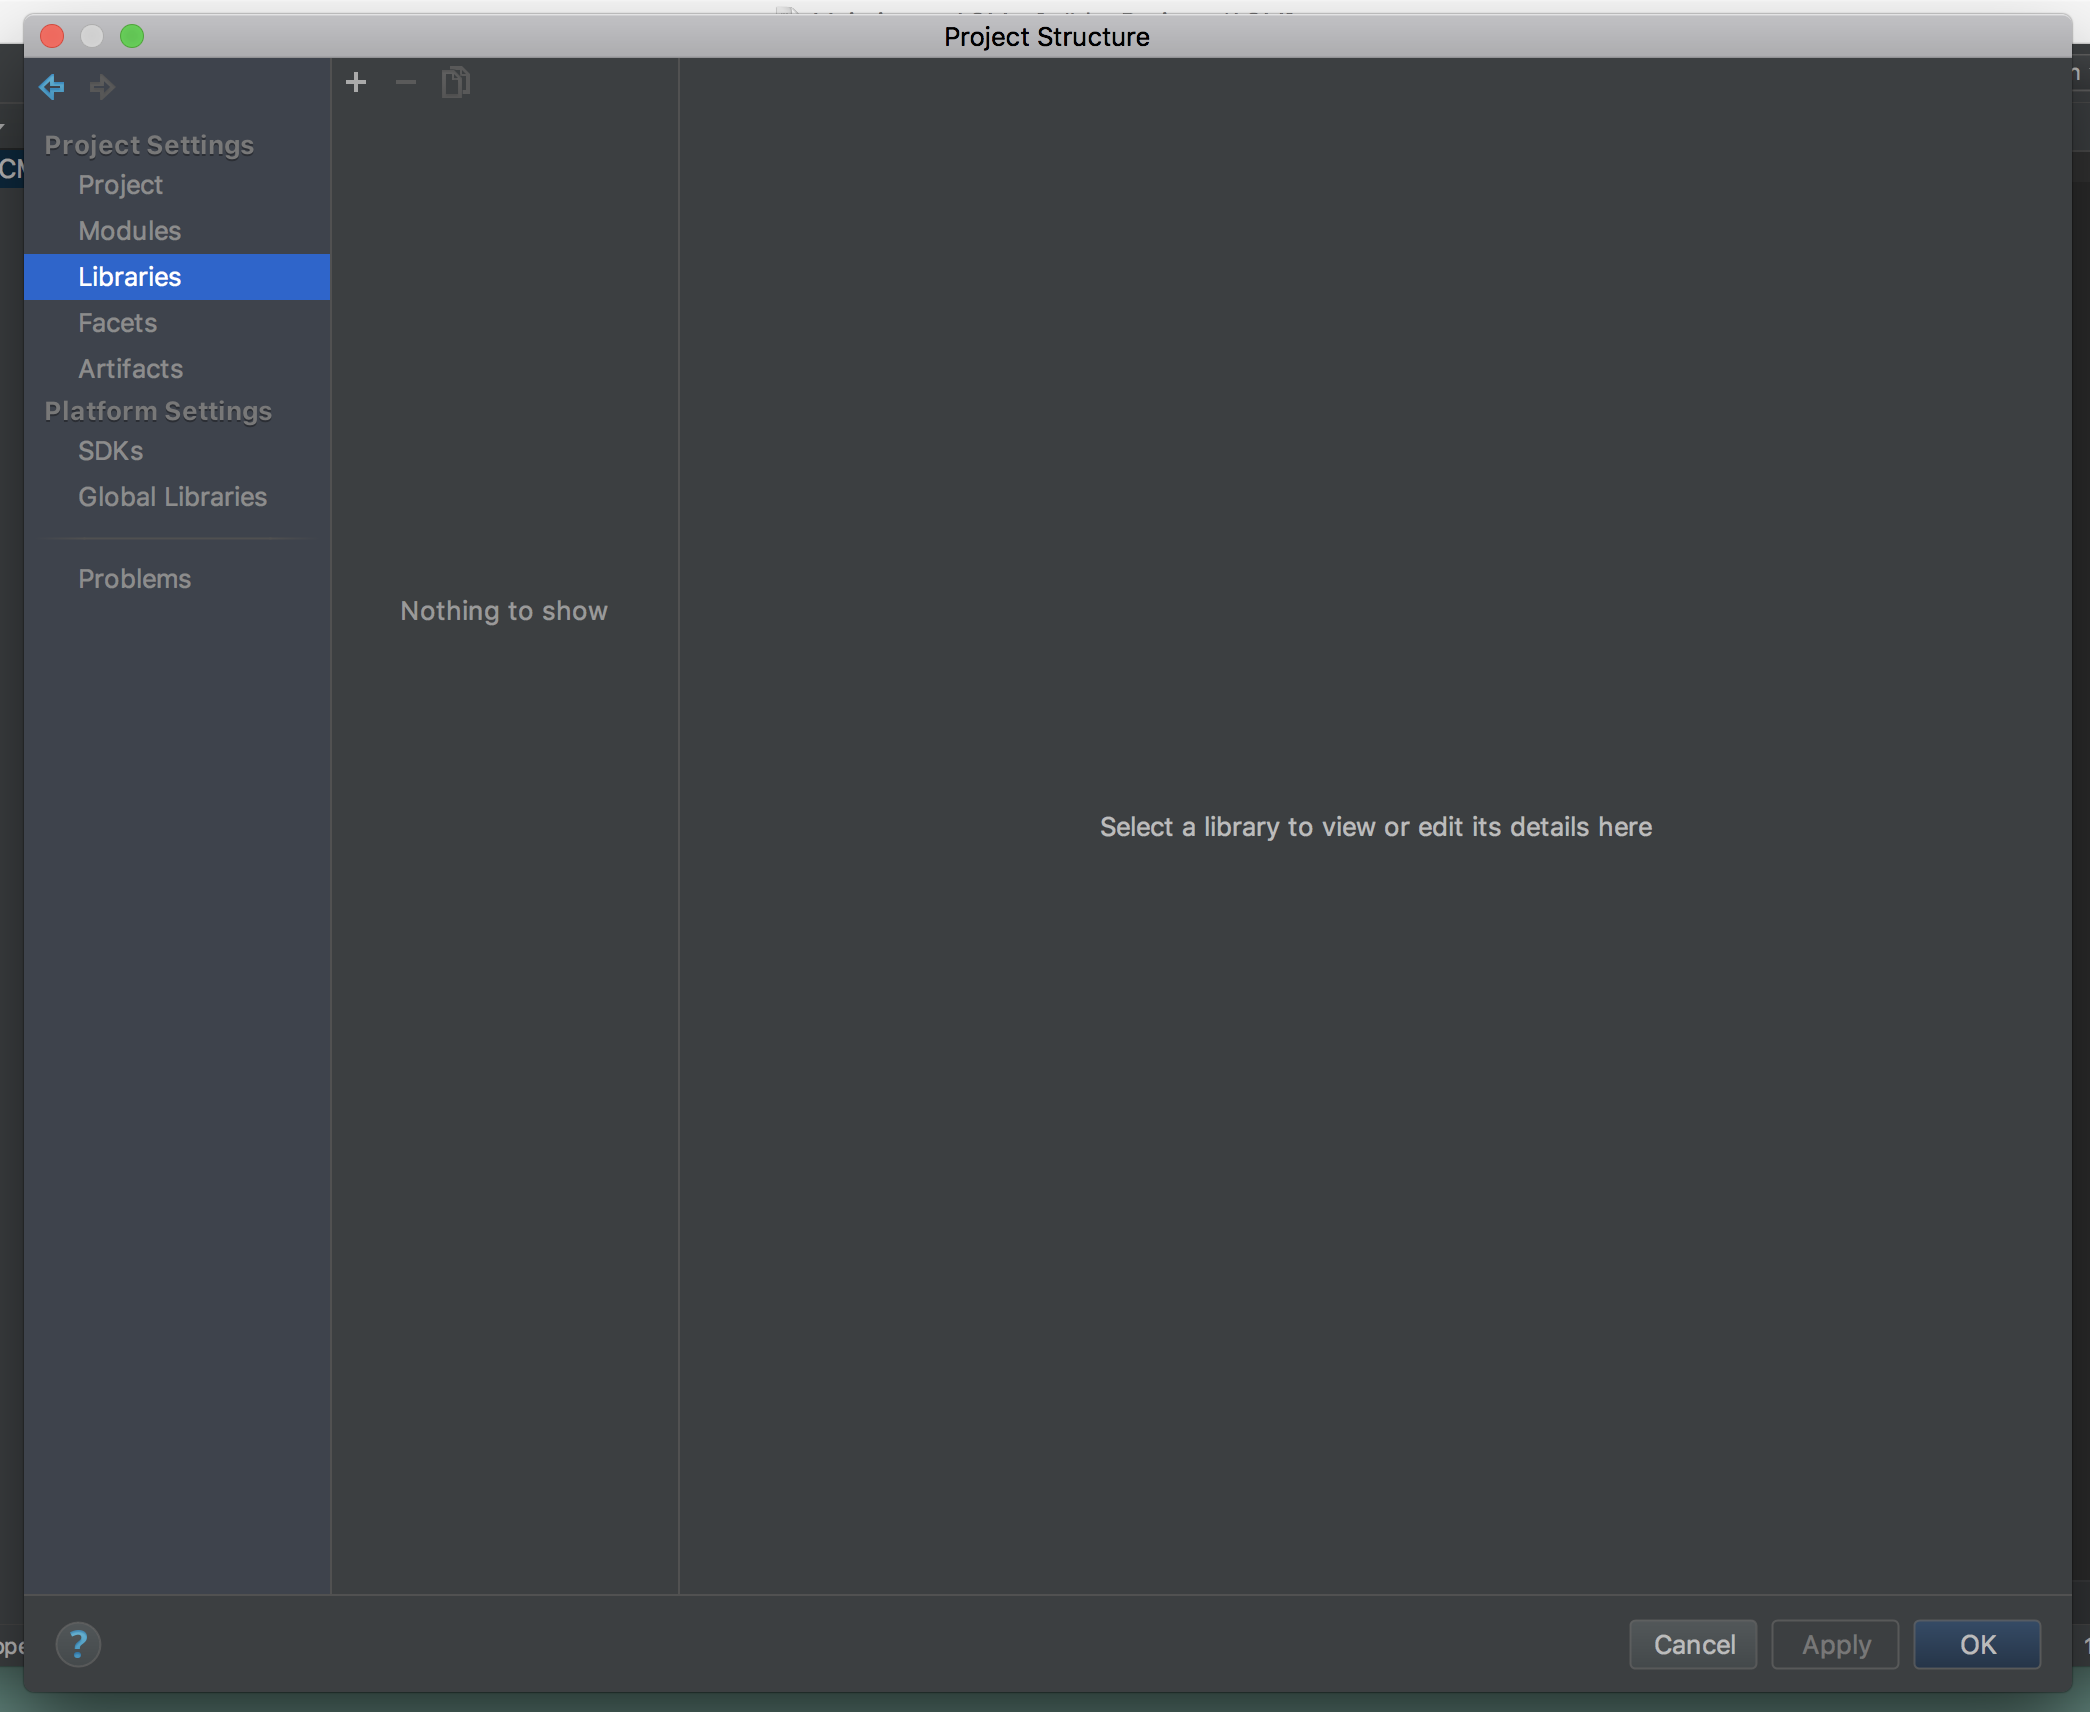
Next we need to add the ACM library to the project. First, click on the `File` menu and select `Project Structure...` In the window that appears, click on the Libraries section.
-
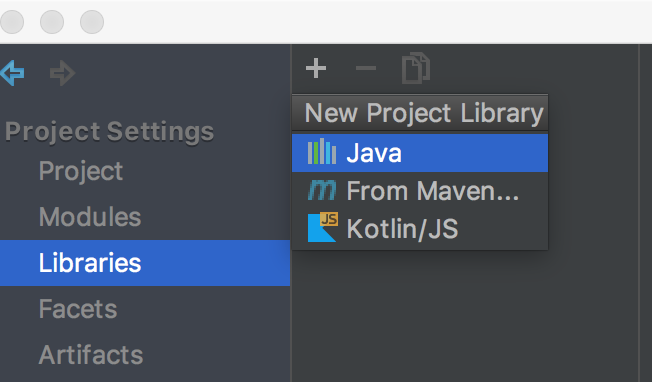
Click the + button at the top to add a new library and select "Java", since we're adding a java library.
-
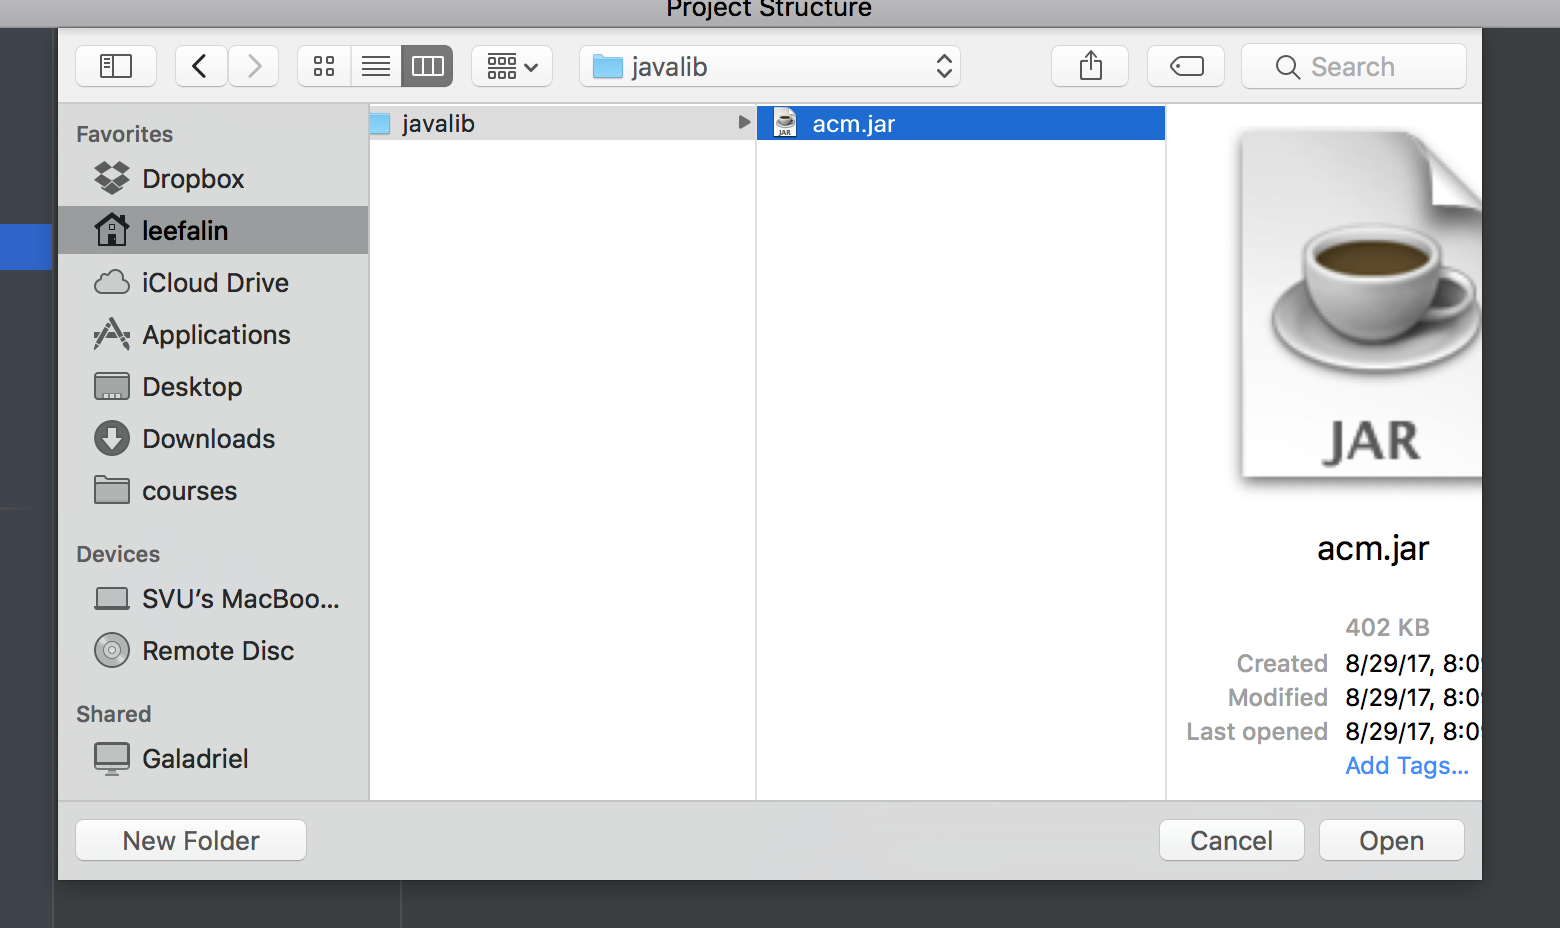
In the file browser that appears, navigate to where you saved your acm.jar file, select it, and choose Open.
-
Click OK to add the library to the project, then click OK to close the Project Structure settings.
-
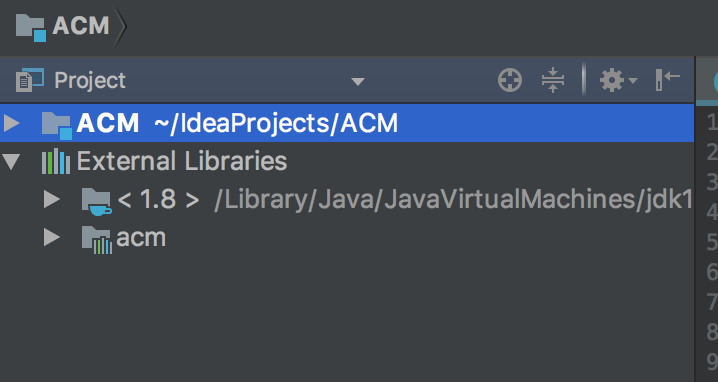
If you now expand the External Libraries list, you should now see the acm library in the list.
-
Change the code in the file to the following (leave the `package` line alone):
import acm.program.*; public class Main extends ConsoleProgram { public void run() { println("Hello World!"); } public static void main(String[] args) { new Main().start(args); } } -
Run the program, and you should see a Console window appear with the Hello World text displayed.
-
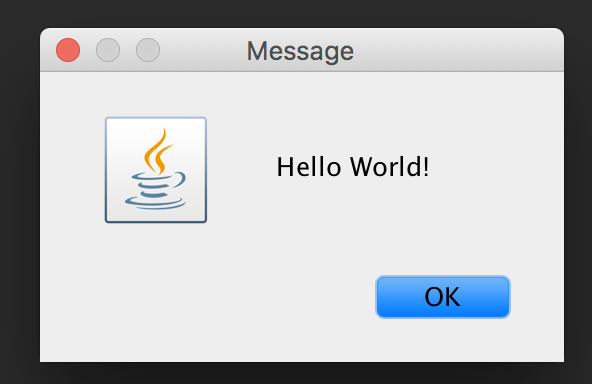
Next, find the line in the code that says
ConsoleProgram, and changeConsoleProgramtoDialogProgram. -
Run the program again, and you will see that the program is now displayed using a dialog box.
Submission
To submit your assignment, follow the instructions for code submission.